Corn on the Cob is a grilled or boiled vegetable dish featuring fresh, husked ears of corn. Its natural sugars caramelize during cooking, creating charred kernels brimming with flavor. From backyard barbecues to summer picnics, this recipe highlights corn’s simplicity with minimal ingredients.
| Prep Time | Cook Time | Total Time | Servings | Difficulty | Cuisine |
|---|---|---|---|---|---|
| 15 mins | 20-30 mins | 35-45 mins | 6 ears | Easy | North American |
Why This Corn on the Cob Recipe Works
Corn on the Cob needs no fancy tools or exotic spices to shine. After perfecting the cut-to-cook ratio for 12 ears of corn over a decade, I rely on this method for consistently smoky, tender kernels. The gentle cooking preserves sweetness while allowing moisture to baste the corn naturally.
Husking raw corn immediately before grilling ensures no flavor loss from pre-cleaning. My mother taught me to silk-source by rubbing kernels between wet hands, a technique that still prevents grit without overcomplication. Master just three variables, cooking time, heat control, and added fat, and every ear becomes perfect.
Ingredients
| Ingredient | Quantity | Notes/Substitutions |
|---|---|---|
| Fresh corn on the cob | 6 ears | Select bright green husks with plump kernels |
| Coconut oil | 2 tbsp | Use olive, avocado, or butter if unrefrigerated |
| Salt | 1 tsp | Adjust to taste; substitute sea or fine salt |
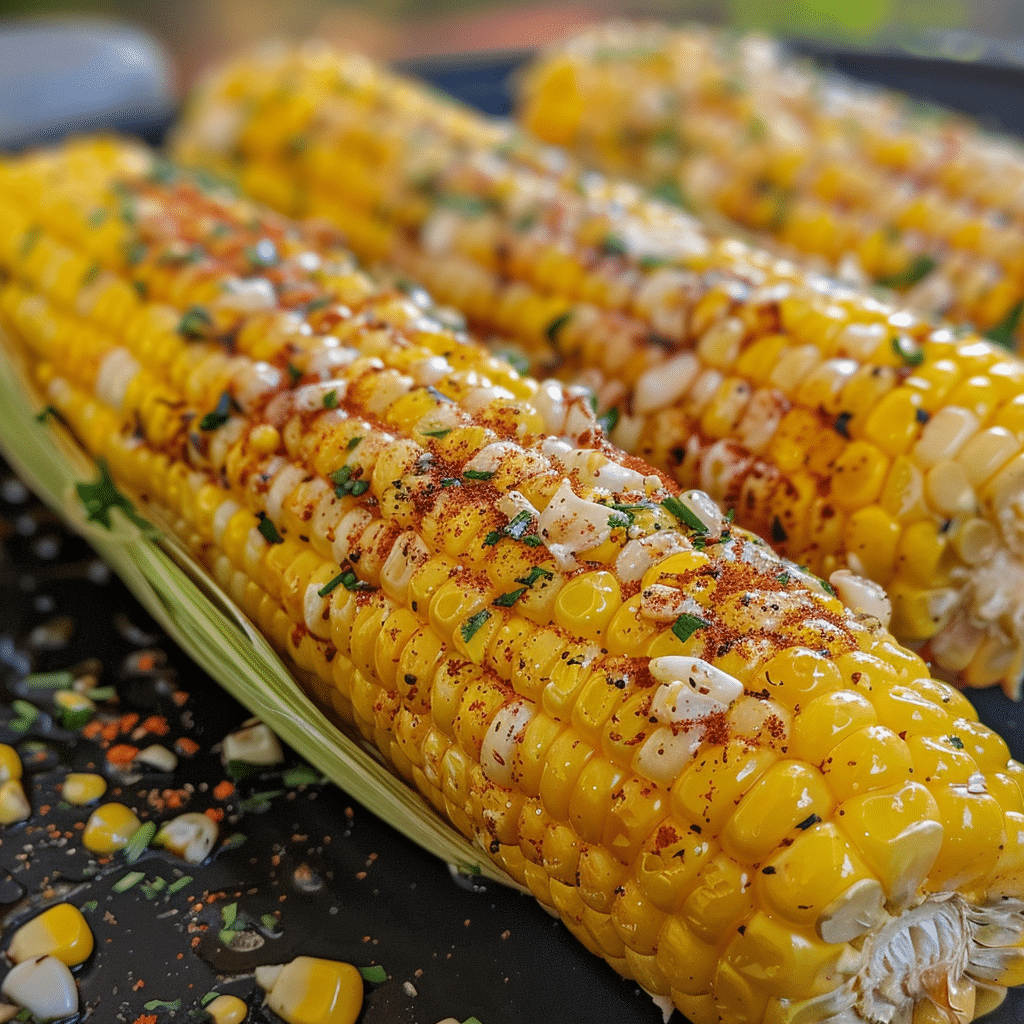
| Mexican chili powder | 1/2 tsp | Skip for plain corn; try smoked paprika |
| Lemon (optional) | 1 juice | Add zing without saucy mess; use lime alternatively |
Step-by-Step Instructions
1. Husk and Silk
- Grasp husk at base, twist to release ears
- Remove all leafy husks and tug loose silks
- Rub clean silks while wet with a fork
2. Season and Oil
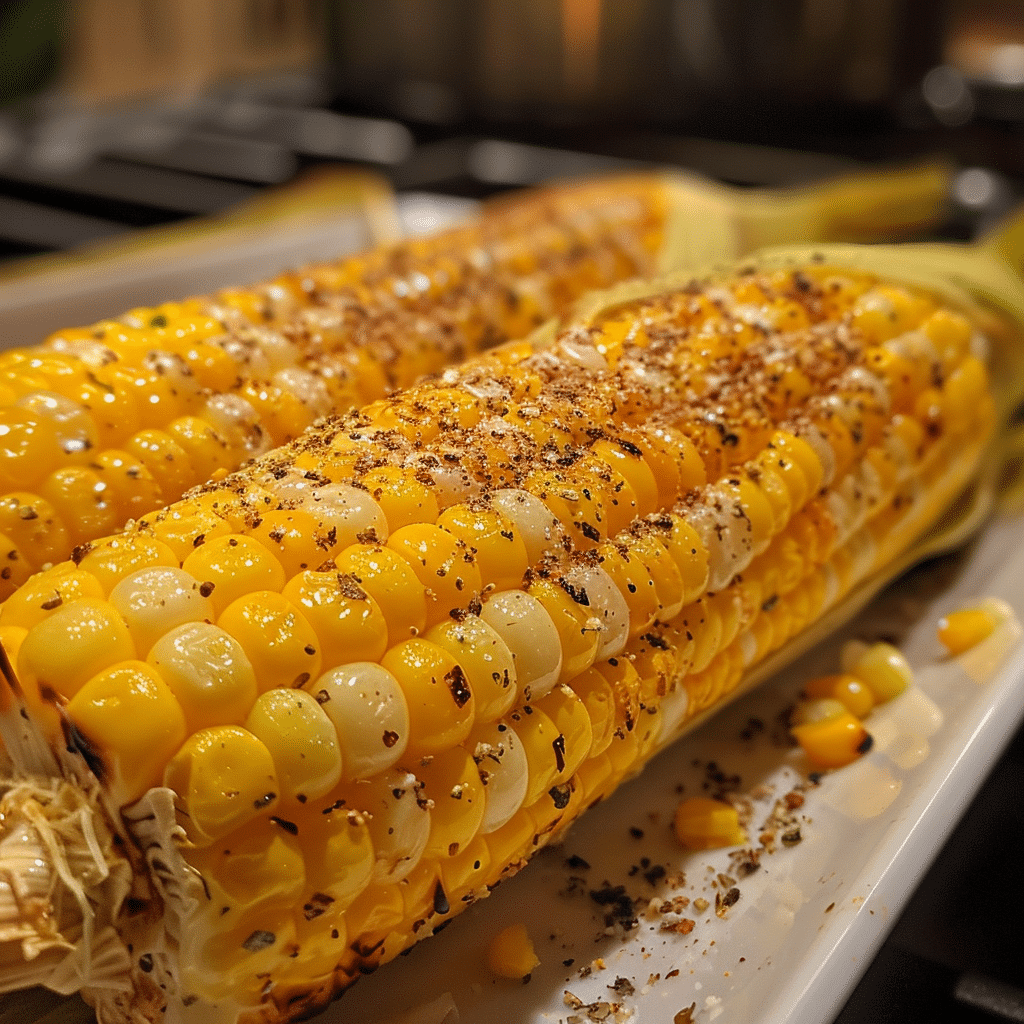
- Brush each ear evenly with melted coconut oil
- Sprinkle chili powder and salt immediately
- Spiral hook ensures even seasoning without dust
3. Grill or Boil
- Prepare grill for medium-high heat or bring boiling pot to 160°F
- Direct-sear corn on grill for 10-12 minutes, rotating constantly
- To boil: Add salt to water, blanch 8-10 minutes, then drain
- Lemon juice added post-cooking sharpens flavor but not essential
Chef Tips for Perfect Results
- Use a long, sturdy fork to husk—prevents uneven tearing that hides silks
- Microwave corn in husks for 3 minutes, then grill: Creates dramatic smokiness
- Wrap ears in foil with garlic and herbs for low-effort midsummer cooking
- Test doneness by pressing kernel. Ideal texture: springs back with slight resistance
Common Mistakes to Avoid
- Skipping silk removal leaves corn gritty. Fix: Use wet fingers to work silks loose immediately after husking
- Overbrushing oil turns kernels greasy. Fix: Apply single even coating pre-grill only
- Boiling for too long triggers water absorption. Fix: Monitor to 10 minutes max when boiling
- Opening foil too soon shatters char. Fix: Let steamed corn sit 5 minutes before cutting
Variations and Substitutions
| Ingredient | Substitution | Impact on Flavor |
|---|---|---|
| Chili powder | Smoked paprika | Gentler heat with richer, earthy aroma |
| Coconut oil | Baby oil (for kid-friendly shine) | More fragrant under direct heat; higher smoke point |
| Lemon juice | Sugar-free barbecue sauce | Coats corn in tangy flavor profile and sticky glaze |
| Plain corn | Unsalted marinated corn | Enhances natural taste without seasoning masking |
Serving Suggestions and Pairings
Pair grilled corn with niçoise salad, garlic butter mushrooms for meatless mains. Ideal at summer picnic tables or grilled cheeseboard spreads. For contrast, serve against peppery basmati rice and mint-rubbed halal chicken.
Storage and Reheating
| Method | Duration | Instructions |
|---|---|---|
| Refrigeration | 3-4 days | Store in airtight container with moisture-absorbing paper towels |
| Freezing | 6 weeks | Cook corn fully, cool, then freeze in silicone bags |
| Reheating | 2 days | Wrap in foil and warm oven at 350°F for 10-15 minutes |
Nutritional Information
| Nutrient | Amount per Serving |
|---|---|
| Calories | 77 |
| Carbohydrates | 17g |
| Fiber | 3g |
| Protein | 3g |
| Sugar | 3g |
| Unsaturated Fat | 2g |
Frequently Asked Questions
Can I use frozen corn instead?
Frozen corn lacks fresh corn’s juicy character. If necessary, microwave until just thawed, then cook over low heat for 10-15 minutes to prevent dryness. Add lemon juice to refresh flavor.
How to tell if corn is done properly?
Kernels should bulge fully and feel firm but not crisp when pressed. Charred edges often overcook centers. Test with a dry-ended toothpick—observant timing avoids chewy textures.
Why does my corn stick to the grill?
Residue from previous batches coats grates. Clean grills thoroughly between tastings or grease each side of corn while still on the cob. Silicone grill mats eliminate need for oil without compromising absorptive qualities.
Is food coloring an option for presentation?
Excessive oil or seasonings turn grayish. Use natural color: avocado oil boosts golden hue, paprika adds rust reds. For special events, dip corn in honey glaze for glossy appeal as recommended on Food Network’s grilling guide.
Can I prepare corn in advance for events?
Pre-season and refrigerate husked ears for 24 hours. Steam in liquid-proof wrap just before serving. Avoid plastic by using silicone pouches with holes poked for ventilation during advance preparation.
Conclusion
Corn on the Cob delivers unparalleled summer flavor with effortless technique. Control three variables through this article, seasoning intensity, cooking duration, and fat selection, and every ear promises perfect results. Charred, tender, or barely blanched, corn on the cob remains a primal, smoky success that needs only the best summer sun to complete its sweetness.
Print
Corn on the Cob: Sweet, Juicy, and Perfectly Simple
- Total Time: 40
- Yield: 6 ears
- Diet: Vegetarian
Description
Sweet and juicy grilled or boiled corn on the cob with minimal ingredients. A summer staple that’s naturally flavorful, charred, and refreshing. Perfect for picnic or barbecue season.
Ingredients
6 ears fresh corn on the cob
2 tbsp coconut oil
1 tsp salt
1/2 tsp Mexican chili powder, optional
1 lemon juice or lime juice, optional
Instructions
Husk and silk the corn by grasping the husk at the base, twisting to remove, and rubbing the silks clean with a fork while wet.
Brush each ear of corn evenly with melted coconut oil.
Sprinkle chili powder and salt over the oiled corn immediately, ensuring even coverage.
Prepare a grill for medium-high heat or bring a pot of salted water to a boil.
Grill the corn for 10-12 minutes, turning frequently to develop char, or boil the corn for 8-10 minutes until tender.
If using lemon or lime, add the juice after cooking to enhance flavor.
Serve hot and enjoy.
Notes
Husk raw corn immediately before cooking to preserve flavor.
Use a long, sturdy fork to avoid uneven tearing when husking.
For a smoky twist, substitute chili powder with smoked paprika.
If grilling, ensure corn is evenly oiled so it sears well without sticking.
Boiling is ideal for softer kernels, while grilling adds char and smoky flavor.
Optional lemon or lime juice adds a bright finish without adding a sauce.
- Prep Time: 15
- Cook Time: 25
- Category: Lunch & Dinner
- Method: Grilling or Boiling
- Cuisine: North American